TGMC:Marine Quickstart Guide

|
This page is a part of the TGMC wiki.
TGMC is a project based on the CM-SS13 codebase. |
Welcome!
You've decided to become the hero the corps need, good choice! This quickstart guide should get you started in no time. But as with any server, it's important you get yourself familiar with the Rules first. We are a Medium Roleplay server, meaning that you should at least try and behave like a marine. That doesn't mean you have to go full "Yes sir", just avoid Low RP shenanigans and excessive memes. While our rules are pretty lenient, that doesn't mean your actions won't have consequences. Excessive stealing or friendly fire will still get you punished. Remember - there are no psychologists on station, but there are field executions. Follow Military Law, or you will be killed and banned.
Your TODO list:
- Gear up
- Keep yourself and your allies alive
- Destroy the xenomorph hive (in Distress game mode)
Do whatever you can to gear up, load up, and heal up to really fuck up the xenomorphs' day. And above all, stick together.
Character creation
In the menu, top most button allows you to set up your character. It also allows you to set game settings and stuff. Your actions should include the following:
- Go to game settings, and set FPS to 60
- Name your character.
- Make sure your species is "Human". Robots are harder and more fragile
, non-humans inferior - Set your job preferences. Set Squad Marine as "High". Other roles are harder and in general require more responsibility.
- Press "Ready" in the main menu.
- If the round has already started, you'll get an error message in the chat. Then press "Join game" and select Squad Marine.
Note that settings menu is assessible in-game from Preferences -> Game Preferences.
Waking up from Cryosleep
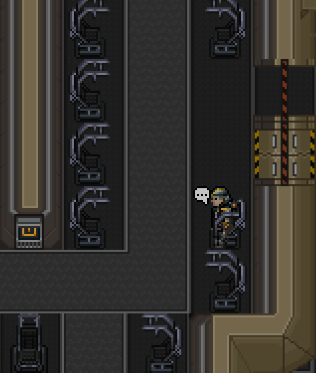
After finishing character creation you should find yourself in cryosleep.
| Your Squad Leader says: "WAKE THE FUCK UP, PRIVATE! WE HAVE A HIVE WITH XENOMORPHS TO BURN!" |
Oh, so you're finally awake? You will be almost naked, hungry and most likely confused, but worry not, the engineers counted on that when designing the ship.
Squad
Unless you picked a preferred squad in your preferences, you will be assigned randomly. Take a look at the chat panel to your right, your squad assignment along with the flavor text should be there. Worry not if you didn't get into the squad you wanted, you will be doing as much shooting as any other rifleman. Squads mostly just form a limiter on non-marine job counts below a certain server population.
Food
Generally, preparation areas are shared between all squads, but the largest ship, the Theseus, has two separate prep rooms for Alpha/Bravo and Charlie/Delta. Just follow the colored lines to get to your half, if this happens to be the current map. It's important to make a stop at the canteen for some breakfast, because hungry marines move slower. Stop by one of the food vendors, click on it and dispense your preferred dish (we suggest one, that's usually enough. Maybe pick one more for later). Pick it up by clicking on it, then click on yourself to take a bite. It might take several of these to fill you up, you've been in cryosleep for a good while. A good rule of thumb is that one prepared meal will add one "level" of food - and so will one protein bar, so don't accidentally overeat.
Your hunger is indicated by this little icon to your right: ![]() It has four stages in total, from almost starving to full: Orange (Starving), Yellow (Hungry), None (Full), Grey (Overweight). It'll go down over time, but you'll lose a lot more if you start bleeding out, as your body drains nutrition to replenish blood. If you suddenly feel like you're walking slower, this is the first likely cause.
It has four stages in total, from almost starving to full: Orange (Starving), Yellow (Hungry), None (Full), Grey (Overweight). It'll go down over time, but you'll lose a lot more if you start bleeding out, as your body drains nutrition to replenish blood. If you suddenly feel like you're walking slower, this is the first likely cause.
Checking the full map
Since we have multiple ships with different layouts, you may find yourself lost or confused. Worry not!
Found in the top right corner of the game's window,
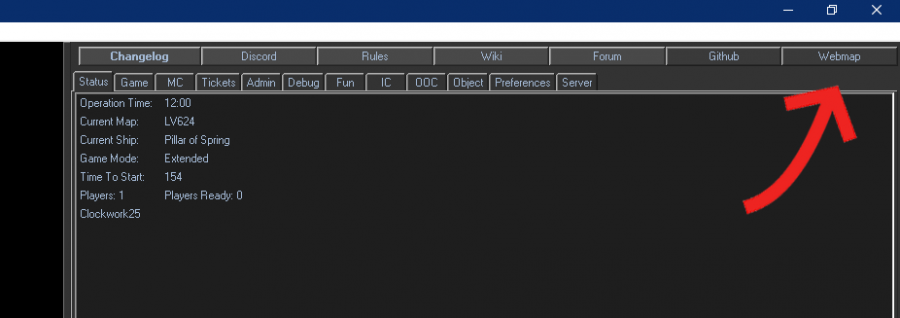
the Webmap button once pressed will present you with the chance to have an interactive map of either the ship or the planetside. A window will open up in your browser, where you'll be able to zoom in/out and move the map of your choice. Note - it might not be available for fresh maps. Ask your comrades for directions.
Gearing up
Quick and easy way
TODO - copypaste loadout
Getting your Uniform and Armor
Video guide: link
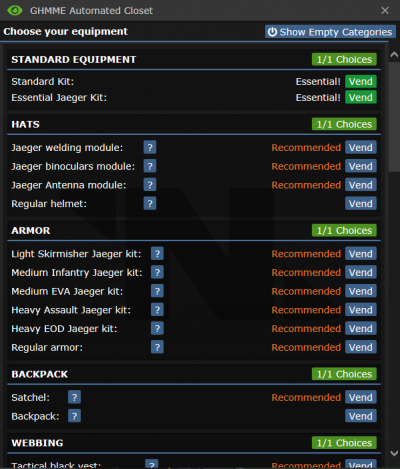
After you had your chow, head into your squad preparations room, which should be nearby. There are also separate rooms for other squad roles, such as Smartgunner, but you don'e have access there. Search for and use the GHMME Automated Closet  by clicking on it. Check the picture below for outline. Make your choices from the list - items marked with a white "Essential" are vital tools for your job. For a squad marine, optimal choice is:
- Essential Jaeger Kit. (Uniform, Gloves, Boots, Headpiece, food, facepaint and the EXOSKELETON)
- Light/Medium/Heavy Jaeger kit. (Helmet which you can put on your empty head, and plates for your exoskeleton - chest, arms and legs. You can paint them using Facepaint on them.) Thake Heavy plates - much more armor, and speed is ok. Then take plate in one hand, exoskeleton in the other, and press on it. Video Guide: link
- Satchel. You start with one anyways. Its a little smaller than Backpack, but later takes time to take items from.
- Tactical black vest. This goes to your undersuit (bottom left) and has several slots to hold items, such as magazines. Click on it with empty hand to access menu.
- Standard ammo belt. This belt is your best friend, because it holds a lot of magazines! If you have a weapon in hand, and press E, that's where you pick your magazines from.
- Firstaid pouch. This pouch can hold medicine, and comes with some as well! Red pills if you're hit, yellow if you're spit, green if you're not sure. Gray if you hate red text about pain. Do NOT take more than one of each pill at a time!
- Flare pouch. There you can hold flares, and it comes full. Easy to fill - drag flare pack (in utility section of Weapon Closet) on it.
- General Purpose Storage Module. Put it on the exoskeleton, has 2 slots. (can hold 2 BOXES of ammo)
- Mark 1 Tyr extra armor set. Increases your armor even more. Best module.
- Tactical gas mask. Allows you to breathe hot and cold air, do not forget it!
More on the Jaeger Armor
The main type of armor used by the TGMC is the Jaeger XM-02 modular armor system. They keystone of this armor is modularity; a user can equip different armor plating, storage modules, and armor modules. One can even customize them with in a variety of colors.
To set up the armor, first you'll need to vend the Essential Jaeger Kit. If you already selected standard, don't worry - you can pick up any Jaeger-related components from the various Surplus Armor Modules around the ship. You'll find one in your prep room.
Start with the Jaeger XM-02 exoskeleton. This is the framework on which you'll be putting the rest of the armor components, and is the bare minimum for a functioning armor set. Note that you can wear the armor without all of the modules equipped, but a complete armor set is recommended.
With the exoskeleton in hand, check the armor plating sections in your vendor. You should see four categories: Chest, Arms, Legs, and Helmet. In these categories will be three armor levels: Light, Medium, and Heavy. Additionally, each of these types has an alternate variant, for example Medium armor comes in Infantry and EVA varieties.
The only statistic that matters on these plating components is their armor level. All other stats are identical between variants. Note that, despite having the name EVA, the EVA armor will not provide any protection from space. Similarly, the heavy EOD armor will not provide any additional explosive protection over the standard heavy variant.
Choose the armor plates you want, one for each region of chest, arms, legs, and helmet. If you want, you can color these components using the facepaint vended by the Essential Jaeger Kit - just click on each armor plate using the paint. To color your helmets visor, right click it with the facepaint. If you're seeing a dropdown menu instead of a color menu, try toggling right-clicking at the top of your HUD.
To install the plates, click on the exoskeleton with each of them, excluding the helmet. This should attach the armor plates to the exoskeleton.
Next, vend your armor modules and storage modules. Each armor module provides either an additional utility or protection; for example, the Mimir module protects against acid and especially gas attacks, and the Tyr provides protection against most damage. Modules (except the light amplifier) will slow you down, with the Tyr slowing you down twice as much, so choose carefully. The storage modules each allow you to store a category of items, being medical, engineering, or general. Armor and Storage modules are installed by the same method as armor plates.
The helmet has its own set of utility and armor modules, equipped using the same method - click the helmet with the relevant module.
Once all your modules and plates are equipped, use the hotkey E to equip it. Otherwise, click on the exosuit slot in the bottom left of your HUD.
Note that if you prefer the Xenonauten armor, it is effectively identical to the Jaeger sets, with armor values corresponding to arms and legs installed with light, medium, and heavy chestplates. It now has the same modularity as the Jaeger, so the only difference is that it is visually designed to look more like modern body armor and less like a sci-fi exosuit.
Pouches and Storage
After finally setting your armor up, you'll still have the rest of the automated closet to go through. For specialist roles, the choices here are a bit more important, because what they carry has a large impact on what they can do to support their team. As a squad marine, though, you should mostly be concerned with how many bullets you can carry, and how long you can keep yourself in the fight.
There's uniform storage options under the webbing entry - the webbing vests have more storage for smaller items, but the tactical webbing can hold larger items like magazines, except the larger magazines for LMGs. You can also put a holster here, but unlike the belt holsters it only holds the gun. Click on your uniform with one of these in hand to strap it on.
Belts are probably the most important option under this section, because they can easily provide about half your storage, but unlike the backpack slot they're more limited in what they can carry. Pistol belts can carry a pistol and six spare pistol magazines, the utility belt can carry any three normal or smaller items, and the ammo belt can hold six standard magazines, but, like the webbing, can't hold things like LMG drums.
A popular choice for pouches is the first aid pouch, which contains four blister packs of around half a dozen pills each, with various medicines in them, plus splints for broken bones and an emergency injector to stabilize someone else who's fallen unconscious. Flares are another good option, for lighting up areas from a distance, and you can't go wrong with more magazine storage. Make your two choices here. Remember, you can get more pouches from the surplus vendor, but they generally won't be pre-stocked like the ones from this personal closet. (The tool pouch will always be stocked.)
You can also choose between a backpack and a satchel here. A satchel has 15 "blocks" of storage (tiny takes 1, small takes 2, normal takes 3), while a backpack has 24, but a backpack also has a second-long delay to pull anything out if it's on your back.
Don't worry too much about your attachment choices, the weapons vendors have an infinite supply of all of them.
There's no reason to wear anything other than the coifed gas mask - make sure you're wearing either it or the coif on Icy Caves or Ice Colony, and gas masks in general will minorly protect you from a few threats, but otherwise choose whatever you like the look of the most. The main thing that matters for gas is the Mimir module. Speaking of which, wear a gas mask if you're using that module, or it won't do anything.
Getting your Weapon
NOTE: all weaponry is balanced to be 'viable', with difference coming in the form of playstyle each requires, such as shotguns CQC or marksman rifles range.
Experiment and try different builds, aim to have fun and enjoy the game.
You will never be a dead weight for your team, unless you're shooting them instead of the enemy.
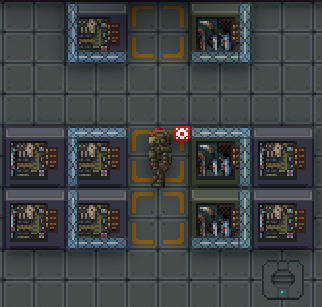
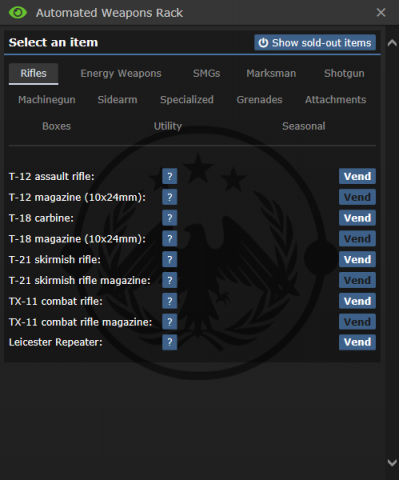
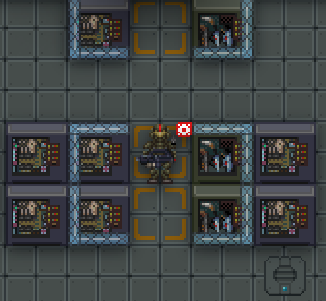
Across from your uniform vendor, inside your cubicle, there should be a weapons vendor.  You may notice there's quite a large variety.
Here's an example of one of them.
- Step 3
- Pick one up with your other hand, then click on your rifle to load it. Your T-12 will be empty, so you must load it.
- Step 4
- Click the toggle firemode button in the top-left of your screen to switch the rifle firing mode until you switch the rifle to automatic firing mode, which allows you to hold down your mouse to fire.
- Step 5
- After that, equip your rifle with E or click on your suit storage slot. Put the rest of your magazines into your ammo belt, pouch, satchel, or webbing.

Now is the time for adding attachments onto your gun.
Getting your Attachments
To check what attachments your weapon can support, inspect it (Shift+click on the item) and the click on the link in 'The codex has relevant information' to open the codex and see the full list of attachments available, as well as any stats for your weapon. Some weapons come with attachments that cannot be removed, such as the stock on the T12.
Attaching something is the same as reloading your rifle: Rifle in one hand, attachment in the other, click the rifle with the attachment. Attachments can also be examined like a weapon to see what effects they'll have. Maybe counter-intuitively, lower scatter is better. Scatter refers to where your bullets go, accuracy refers to whether they hit anything they pass over, most others should be self-explanatory.
Getting other Gears
After you're done, you might also want to grab a few flare packs and put them into your satchel. Flares serve an important role, giving you intel and may prevent you from walking into an ambush. Always flare a room first before pushing into it with your squad. Flashlights work forever, but they're much less space efficient and can be disabled with a single slash. You may notice a requisitions area, which is where you can get more advanced gear such as grenades. Since your basic setup is complete for now, you can ignore this area.
Loadout
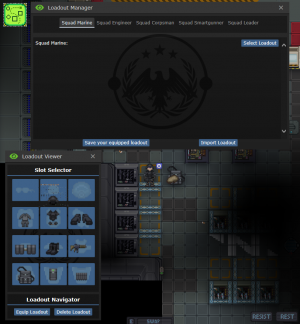
After getting your equipment the way you want it, head over to a loadout vendor and save your current equipment. On subsequent rounds, you can go straight to here and instantly equip everything at the same time.
This won't work for things that don't come from the vendors, though, they just won't be vended at all.Heading to Planetside
After this, you are almost ready to rumble! Briefing is nearly always held over radio, if held at all as it is more time efficient than making people stand around. They are usually announced around 12:05-12:10, but should you miss them ask your squadmates (;) or on the general channerl (:h). You should head through the briefing area and into the hangar, which is usually found west of briefing, if you're unfamiliar with the ship's layout use the webmap button at the top right, and click 'Ship' to access the online map. There will a beige dropship, the Alamo. Board the ship, find a seat and buckle in. The PO or a squad leader should launch once most people are inside. The flight shouldn't take long, you may use this time to talk with your squad and other marines. Press T and use ; to talk on your squad channel and :h or .h to talk on the general channel that everyone has access to.
Battle, or TIME TO UNGA
In general, fighting through the ground is a slow process of fighting off angry xenomorphs, carving through resin walls with knives to destroy their killing lanes, and pushing through to their critical hivemind-stabilizing silos. Keep looking at your automap (open and close by clicking the green button on the top left), and make sure you aren't wandering too far off from the main group of marines. Squad leaders (squad-colored L in person, squad-colored star on the map) and the Field Commander (white-on-blue star in person, yellow target on the map) have trackers that point them to the final objective, and can buff you by shouting orders if you stay near them, so follow their lead.
When there's an enemy nearby or you hear shots or other signs of potential hostile activity, take your rifle out of your armor slot by either clicking on the sprite or pressing E. When you want to shoot, always make sure to wield it by hitting Z with it in your active hand, then click somewhere to shoot. Never fire a rifle-sized weapon one-handed as it causes a lot of recoil; you can tell when the screen shakes a lot. Always stay near your allies so that they may help you out when you get in a pinch.
If your rifle is out of ammo and you have an ammo belt full of fresh magazine:
- Step 1
- press Z to unwield your rifle since you need an empty hand to get your new magazine
- Step 2
- press X to change the active hand from your rifle hand to your empty hand
- Step 3
- press E to instantly get your new magazine from your ammo belt
- Step 4
- click the sprite of your rifle with the magazine on your hand
- Step 5
- press X to change the active hand from your empty hand to your rifle hand
- Step 6
- press Z to wield your rifle.

|
Generic FC says: "Whew! That was fun reloading your gun under heavy fire!" |
Pushing Forward
When you're on the offensive, you should be more focused on cohesion and not walking into dangerous areas. In general, it's best for every Marine to be packed together fairly closely, but not so closely that nobody can fire or chase down kills. Don't get left behind and don't push ahead too far on your own, even if the area seems safe. If the area ahead is full of resin walls with thin passages through them, don't try to push through it; clear it out with machetes, flamethrowers, the Pilot Officer's fire support, an Engineer's plasma cutter, or a lot of bullets. The same goes for purple sticky resin on the floor, because walking over it will make you incredibly slow and thus vulnerable. Also look out for tiny resin holes at the center of floor tiles, usually hidden behind fallen items; walking over one will trip you for a long time and release a facehugger to attack you!
Falling Back
When you're on the defensive, either around a forward position (likely near a mineral miner) or the landing zone itself, you need to balance staying safe behind the barricades and pushing out with other marines to finish off xenomorphs. Don't leave the barricade wall alone, or you'll likely be flung, shoved, and dragged away from the rest of the force. Keep in mind that, generally, your team will lose if you keep trying to hold without pushing out again, but you aren't really in a position to change that, yet, so the most you can do is try to make critical plays with grenades or other high-damage weapons to give everyone an opportunity to get moving again. If things start getting rough, be on the lookout for a squad leader or officer calling for evacuation, and make sure you're on the Alamo when it leaves for the last time. After it lands in the hangar, get off, fast; the xenomorph hive leader will psychically call the dropship back down once the engines are cooled off again, They will then choose to either try to attack the main ship by hijacking the dropship, or simply capture the dropship and end the round. If they hijack, follow a high-ranking job's lead, because there isn't too much of a protocol to go off of otherwise.
Firing lanes
It is very important to move in one line with your fellow marines and fire in a way where you won't hit your squadmates. It is better to miss a shot than to hit a friendly marine. Medics are a rarity. Always let the people in the front shoot, don't try and move through them. Staying on grab intent ![]() (the yellow intent, hit 3 to use it) during a firefight is vital, otherwise if you walk into someone who is also shooting with help intent
(the yellow intent, hit 3 to use it) during a firefight is vital, otherwise if you walk into someone who is also shooting with help intent ![]() , meaning that both of you are in help intent, you will swap positions and get hit. If you do need to shoot through marines, and you aren't the Smartgunner, make sure you're in aim mode!
, meaning that both of you are in help intent, you will swap positions and get hit. If you do need to shoot through marines, and you aren't the Smartgunner, make sure you're in aim mode!
Aim Mode
Through the miracle of aiming ![]() you can fire through your fellow marines with reckless abandon! Albeit with a slower move speed and fire rate. Note that not all weapons can be aimed.
you can fire through your fellow marines with reckless abandon! Albeit with a slower move speed and fire rate. Note that not all weapons can be aimed.
Stamina
You may have noticed that you have been walking this time.
If you hold down Alt, you will begin to run. If you press 5, you change your movement intent, meaning that you don't need to hold down Alt while running.
Running makes you move faster at the expense of some stamina and melee accuracy (but you shouldn't be in melee as a standard Marine anyway). Some attacks also do stamina damage, and if it reaches a sufficiently low level you get knocked over. Your current stamina can be seen by this lightning bolt ![]() . When it is emptied, it will look like this
. When it is emptied, it will look like this ![]() and shortly becoming a lightning bolt that is darker blue, with a 100% text, indicating your fatigue. Taking further stamina damage will turn the lightning bolt orange and then red when completely empty. You will have to wait to recover from fatigue before your stamina portion starts regenerating.
and shortly becoming a lightning bolt that is darker blue, with a 100% text, indicating your fatigue. Taking further stamina damage will turn the lightning bolt orange and then red when completely empty. You will have to wait to recover from fatigue before your stamina portion starts regenerating.
Neurotoxin will drain your stamina and start killing you once it hits 0, so find a medic if it starts dropping on its own!
Light
You may have noticed there's a button in the upper left of your screen. Click it to turn your armor light on. It is vital to keep the light on at all times, so you can see the environment and marines can see you. It is easy to get spooked by a marine in the dark and accidents may happen.
Keep in mind that every time your armor gets taken off, either by you or by a medic reviving you, the light is turned off and has to be turned back on manually. This also happens when you die, or get attacked by a facehugger.
Overcoming obstacles
If there's a wooden barricade, use your knife to destroy it. If it's a plasteel one, click on it with an empty hand to flip it open, walk through and flip it closed. It is vital that you always close the barricade after you move through it to prevent enemies from easily passing it.
If you see a table or a window frame, drag your character's sprite onto the obstacle or ctrl+click on the obstacle with an empty hand. This should allow you to climb through after a short animation.
You may also flip a table over by clickdragging it a certain direction, turning it into a piece of cover. This doesn't always work though, such as with wide or reinforced tables, and doesn't compare to a good metal or sandbag 'cade, but it's useful in a pinch.
Question?
If you are lost or have a question, feel free to use the MentorPM under the admins tab in the top right to ask experienced players a question. They'll be happy to help! Alternatively you can also use OOC or LOOC chats to ask about something, although you should keep in mind to not give away information about the current ongoing round.
I wanna be more Important!
Woah there cowboy! If you want to try a different marine role you can try the Smartgunner for extra firepower, or you could alternatively try out a non-combat shipside role like the Ship Technician.
Other Activities
If you're having trouble adjusting to or enjoying frontline combat, and want to contribute to your team in some other way without taking on the responsibilities of a specialized job, there's still a few options for you:
Mineral Miners
These drills all over the map, marked with pink and silver icons, are capable of generating points for the marine side. With a welder, wrench, and wirecutters, anyone can fix them, even if Squad Engineers are the best at it. As a normal marine, you can set up a defensive position with sandbags or metal around these machines to likely benefit your team more than you would on the front lines, as long as you keep them active. Make sure you bring some kind of eye protection if you're repairing it yourself! Staying behind barricades is obviously a lot safer, and your teammates will thank you when they need somewhere secure to hide from a flanker, or when a Marine with a minigun you paid for ends up shredding the Queen. If you like this sort of gameplay, consider actually playing as an Engineer.
Sniping
The TL-127 rifle can fire at enemies a long distance away, and with aim mode the bullets will go straight through any Marines on the way there. You won't be hitting that hard on your own, but an extra 80 damage might just stop a xenomorph from retreating behind a corner. At fights near the landing zone this is more effective, but it can work in any open area. Just make sure you aren't getting left behind, or those same flankers you keep trying to pick off will be the end of you. The laser sniper doesn't have to worry about travel time, but it can't use aim mode and does a lot less damage. Requisitions can also provide you with an autosniper with a night vision scope, which is a Boiler's worst nightmare.
Terminology
Starting out, you might not understand some of the things people scream over the radio. Here's a list of some of the commonly used phrases that some new players frequently ask about, and their explanations!
[Expand
]
- Alamo: The tan transport dropship.
- AP: Armor piercing.
- BE: Battlefield Execution. Not allowed on our server.
- Bino(s): Binoculars, usually to refer to Tactical Binoculars specifically.
- FUBAR: Fucked Up Beyond All Recognition.
- Cap: The Captain. Commander of the operation and effectively your boss' boss alongside the FC.
- CAS: Close Air Support. Don't get hit by it!
- CE: Chief Engineer. People never remember the "ship" part of their name.
- CIC: Combat Information Center. Where command lives. One of two popular last stand locations.
- CL: Corporate Liaison. Nanotrasen's bitch.
- CMO: Chief Medical Officer. Just a doctor with status.
- Condor: Dedicated CAS plane.
- Cycle: A process in which a dropship travels from one place to another, usually between the ship and the LZ.
- DS: can refer to 2 things: Dropship(commonly refers to the Alamo specifically), or Deathsquad. Hostile ERT faction. Accept death, resistance is futile.
- Engi: can refer to 2 things: Engineers in general(be it the Squad or Ship variety), or the location where generators usually are.
- ERT: Emergency Response Team. The guys that come when you call them via distress signal when things go FUBAR. Might not be friendly.
- Evac: Evacuation. For cowards.
- FC: The Field Commander. That headless guy you're supposed to be following.
- FF: Friendly Fire. Don't do this.
- FOB: Forward Operating Base. Where the Alamo lands and where marines hold their ground.
- GL: Grenade Launcher.
- HC: TGMC High Command. TGMC's counterpart to Nanotrasen's Centcom.
- HE: High Explosive.
- IA: ImiAlky. Chemical mix of Imidazoline and Alkysine, which heals eye and brain damage.
- IS: IronSugar. Helps with blood regeneration.
- LOOC: Local Out Of Character. Can be done by pressing L. Like OOC, but local, obviously.
- LZ: Landing Zone. Where the Alamo or Tadpole lands.
- MeraDerm: Chemical mix of better healing meds that heals brute and burn damage quickly.
- MO: Medical Officer. The doctors that pull out all that machine gun shrapnel you have.
- NT: Nanotrasen. The fuckups that caused all this mess.
- OB: Orbital Bombardment. Don't get hit by it!
- PB: Point Blank. The act of shooting something at point blank range(right next to it). Commonly done with buckshot-loaded shotguns.
- PMC: Private Military Contractor. Friendly ERT faction. Paid by Nanotrasen.
- PO: Pilot Officer. The dipshit that flew to the wrong LZ.
- Pods: Drop Pods. For quick redeployment or playing at being an ODST. Or suicide.
- Prae: Praetorian Caste. Spits at you, menacingly.
- Rav: Ravager Caste. Big scary xeno with swords for fingies.
- Razorburn: Refers to Razorburn Grenades, which spills out a foam that creates razorwire.
- Req: Requisitions. Where you get the good schtuff.
- RO: Requisitions Officer. The guy that gives you the good schtuff.
- Rouny: OOC joke. May be said as marine, though not excessively. Shouldn't be said in IC as a xeno. Occasionally an admin will spawn one in as an actual playable xenomorph.
- RR: Can refer to 2 things: Russian Red, a healing chem, or a Recoilless Rifle
- Sent: Sentinel Caste. Spits at you.
- SD: Self Destruct. Where to go if you need the ship to go boom. One of two popular last stand locations.
- SG: Smartgunner. The guy that's supposed to be behind you, but isn't for some reason.
- SL: Your boss. Also doubles as a walking compass.
- SO: Staff Officer. The guy screaming over comms telling you what to do.
- SOM/SoM: Sons of Mars. Hostile ERT faction. Shoot at when fired upon.
- SSD: Sudden Sleep Disorder. Catch-all IC term for being unable to play, such as when AFK or when disconnected.
- ST: Ship Technician. The bored shipside guys in blue.
- Surv: Survivor. They won't survive. Except when they end the round by killing all xenos before marines even deploy, an event called a "Survivor Major". Retconned out of existence pending an unlikely rework, thanks to said Survivor Majors.
- Tad: The Tadpole. The dark grey mini-dropship used by those with suicidal tendencies or genius level intellect. Or both. Sometimes a last stand location.
- Tangle/Tanglefoot: Plasma drain stuff that limits xeno abilities. Can refer to the OB load or the grenade.
- Unga: Catch-all term to refer to marines or their mentality, usually refers to their recklessness specifically.
- QC: Quick-Clot. Stops internal bleeding.
- WP: White Phosphorus. Usually refers to White Phosphorus Grenades, which are better incendiary grenades. Perfect for warcrimes!
- Xeno(s): The enemy. Shoot on sight.
- XRT: Xeno Response Team. Hostile ERT faction. Consists of extra xenos, because fuck you that's why.
| TGMC Roles 
| ||
| TerraGov Marines | Command | Captain, Field Commander, Staff Officer, Pilot Officer, Transport Officer, Mech Pilot |
| Vehicle Crew | Assault Crewman, Transport Crewman | |
| Engineering and Supply | Chief Ship Engineer, Requisitions Officer, Ship Technician | |
| Medical | Chief Medical Officer, Medical Doctor, Researcher | |
| Marines | Squad Leader, Squad Smartgunner, Squad Engineer, Squad Corpsman, Squad Marine | |
| Civilians | Corporate Liaison | |
| Silicon | Combat robots, Synthetic, AI | |
| Xenomorphs | Tier 0 | Larva, Minions |
| Tier 1 | Drone, Runner, Defender, Sentinel | |
| Tier 2 | Hivelord, Carrier, Hunter, Wraith, Bull, Warrior, Puppeteer, Spitter | |
| Tier 3 | Gorger, Defiler, Widow, Ravager, Warlock, Behemoth, Crusher, Praetorian, Boiler | |
| Tier 4 | Shrike, Queen, King, Hivemind | |
| Others | Zombie, Emergency Response Teams, Sons of Mars, | |


