TGMC:Guide to mapping

|
This page is a part of the TGMC wiki.
TGMC is a project based on the CM-SS13 codebase. |
Introduction
Welcome fellow poor soul! You have decided to visit the depraved part of TGMC contribution, mapping. We make the content that you walk on, and then proceed to cope about appreciate!
This guide will cover the following things:
- Installation of StrongDMM
- Basics of our map tool, StrongDMM (SDMM)
- How to make a small map edit
- Basics on making a completely new map
This guide will assume you have read/done the following:
- Have a working github fork and Virtual Studio Code (refer to the following guide to set it up: TGMC's guide to contributions.)
- Accepted your fate as a mapper
With that, lets begin!
Installing the Map Editor
The most simple part of the guide. I will assume you know how to install things on your computer.
Go to this link for the latest StrongDMM release, find your operating system in the "Assets" part, install it, then follow the instruction steps. Put it somewhere you want it to be on your computer, probably near where ever you installed your repo of TGMC. That's it.
Entering the Map Editor
Cool, you now have StrongDMM. Now how do you use the damn thing? Well, after opening it, you will have to open an environment file that TGMC has. To do so, go to the top right of StrongDMM where it says File, then Open.
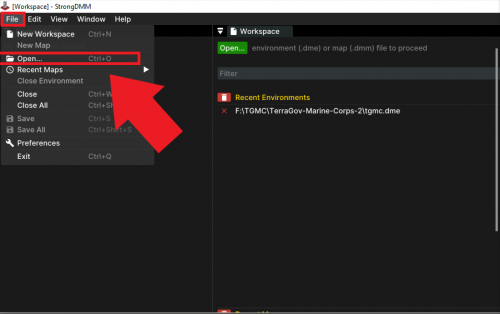
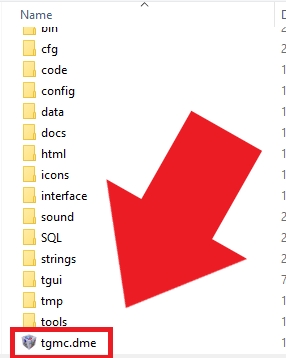
Now, navigate to where you installed your repo of TGMC. Find the .dme file in the main folder, and open it.
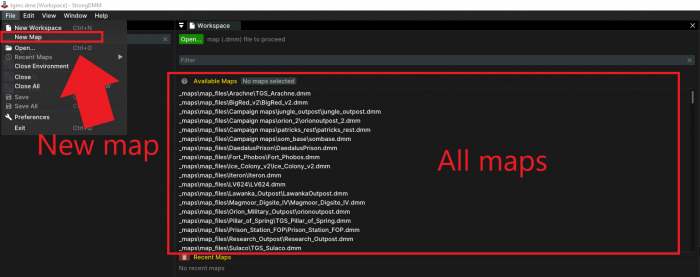
Wonderful, you should now see a list of maps that you can now open, in addition the ability to create a new map in File.
The guide to the basics of making a new map will be at the bottom. The following section will how to use SDMM and make minor fixes/edits to existing maps.
Basics of the Map Editor
Well, now you have opened up a map. For the sake of this guide we will use the ship map Pillar of Spring. Let's say we want to change the name of a door in Preparations.
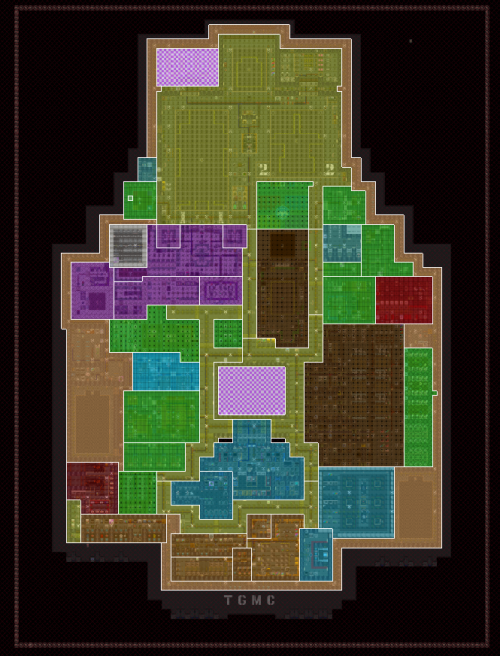
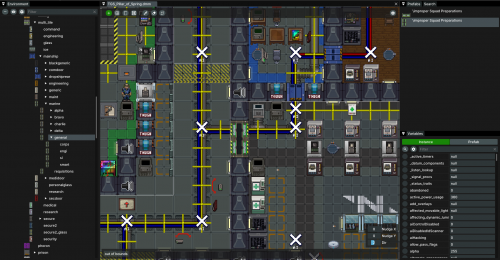
This is a ton of information to take at once. What you are seeing is the full Pillar of Spring map with all of it's layers. This includes area, turfs, objects and mobs. You barely have to worry about mobs during mapping, so lets go over the other ones. Turfs are the tiles you stand on ![]() or walls
or walls ![]() . If there is neither a floor or wall on a tile, it will be empty space which you never want inside the boundaries players play in. Objects are like vendors, guns on the floor or what have you; there can be multiple objects on a tile but not multiple turfs on a tile. Lastly, area. Areas give the tiles certain properties and divide the map into sections; for example, one of the main properties that areas give is ceiling type. The way caves are defined, for example, are with areas; their ceiling is underground so that CAS and OB can't hit it. Areas are also what determine what a certain APC powers
. If there is neither a floor or wall on a tile, it will be empty space which you never want inside the boundaries players play in. Objects are like vendors, guns on the floor or what have you; there can be multiple objects on a tile but not multiple turfs on a tile. Lastly, area. Areas give the tiles certain properties and divide the map into sections; for example, one of the main properties that areas give is ceiling type. The way caves are defined, for example, are with areas; their ceiling is underground so that CAS and OB can't hit it. Areas are also what determine what a certain APC powers ![]() , for future reference ONLY ONE APC PER AREA.
, for future reference ONLY ONE APC PER AREA.
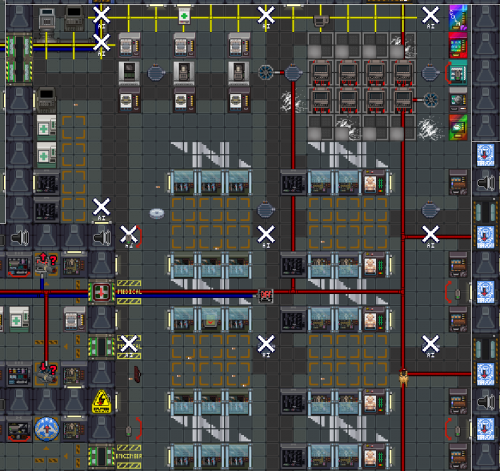
Any who, the main thing to de-clutter your screen is to hide the areas, you can either press CTRL + 1 or go to the top right and click View and uncheck mark Show Area. Zoom into where you want (for the prep doors, prep!). It should look like this.
Onto changing that door name. We will want to place a new door with the name we want replacing the old door. First we want the same door type, so to copy something you hold S and click the thing you want. So for this, I hold S and click the door I want to change. I now can place a new one of it's type anywhere I want; it will look like this:
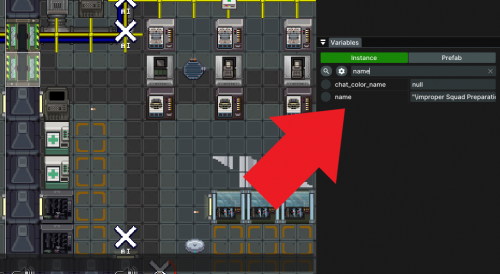
On the left you see a bunch of objects you can select and search up, we'll ignore this for now. On the right we can see different prefabs (we will call these varedits from now on). Without getting too much into coding, a variable (var) is something that holds data. In this case, there is a var that holds the name of the door when you hover over it. On the bottom right you can press Filter and search up the var you want, in this case name;
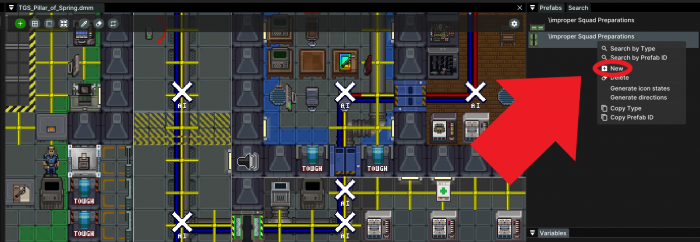
Before we change the name we should create a new varedit of the door so we don't edit existing ones. To do this, go to the top right and right click the door, then hit "New."
Doing this, you can now make a new varedit. Change the name to whatever you want, TEST will be this one. To replace the door, simply delete the old one by holding D and click the thing you want to delete. If you mess up and delete something you don't want to, or in general need to reverse a change, hit CTRL + Z to reverse any one change. Lastly, save all the time! Do this by pressing CTRL + S. You can also fill multiple tiles with a certain turf / objects by pressing 2, the Fill button.
One more thing: NEVER MAKE ICON_STATE VAR CHANGES.
I'll repeat it again: NEVER MAKE ICON_STATE VAR CHANGES.
Just don't, the maptainer will get mad at you and so will the Github linter; they obfuscate what the object or sprite actually is.
Wonderful, that was a basic change. The rest you can mostly figure out on your own; use the search bar on the left and Visual Studio Code to find what object/turf/whatever you want, then place/delete/replace! The map is now your canvas. This was very basic since I can't go into every detail. If you require most assistance, the mappers on our Discord (https://discord.gg/tgmc) in the #mapping channel are more than willing to help.
Making a New Map
The end goal of many people wanting to become a mapper: a whole new map. This is a massive undertaking that can takes up to multiple months. Know what you are getting into. Not scared? Alright.
This assumes you have a little bit of Visual Studio Code and Github competency. Start by making a new branch off of master, name it whatever you want to; likely the map name. A map, not including the DMM file (the file the game uses to make the map on compile), it needs these things:
- An addition to _basemap.dm
- A new json file, MAKE SURE IT IS IN ALL LOWERCASE OR THE LINTER GETS MAD. so do test.json instead of TEST.json.
- A new area file, like test.dm; this holds all the areas you will use on your map. For maintainability sake, do not use areas from other maps. Make your own.
- An addition to maps.txt, this is config. When you actually release your map you have to beg a keyholder to add your map to config.
If you want to see a map PR with all of these, you can look here: https://github.com/tgstation/TerraGov-Marine-Corps/pull/14637/files (ignore the platforms.dm change.)
You can do these at anytime, but these all need to be done if you even want to test your map on local.
With that out of the way, go back into the guide where you were shown the "New Map" button. You'll be able to set how wide (x), tall (y), z levels (NOT CURRENTLY USED), and format (USE TGM).
Creating the map you will see an open canvas, I can't tell you what to do with it but I can give some starters.
- Optional: Fill the entire map with a single tile to provide contrast. Some people like this, some don't: see what you like.
- Nuclear War only: Create 1 or two landing zones. You can copy a landing zone from another map to start, make sure there is a docking_port object on it; /obj/docking_port/stationary/marine_dropship/lz1.
- Create a perimeter around your map with hull walls. These walls cannot be passed or destroyed in other manner, it keeps players contained in the game boundaries.
- Imagine the flow of your map, put down some shapes of the buildings. Flow will depend on the game mode it is designed for; study other maps or ask in #mapping about it.
- Outline some caves, again look to other maps for examples. You can try and use Big Red as a reference, but it's caves are mostly modular. You can look at Orion for "passable" caves as well.
- Start to fill in the map in your own way. Make rooms, terrain and detail. You'll learn as you go and you can again ask for feedback in #mapping, get used to doing that!
Whenever you start to deem yourself "finished", you have to include all of these things in your map for it to work.
- For Nuclear War / Crash: Put down silo landmarks and surround them in an area of fog, look at other maps to see how big the fog should surround. There should be NO GAPS in the fog.
- For Human vs Xeno Gamemodes: Weed nodes spaced to connect to eachother, as well as landmarks for larva to spawn.
- /obj/effect/landmark/dropship_start_location somewhere on the map, this allows CAS to function.
- One APC for each area, except for those with a var always_unpowered = TRUE. Connect every APC together with cables and link them to generators alongside SMES's.
- Pipe network, you only have to do one pipe network instead of two; one for waste and one for distribution. Don't torture yourself.
- AI nodes. A downloadable PDF is on the Discord in #mapping on how to place them, but the basic jist is that they need to connect to another AI node in a cardinal direction in less than 15 tiles, or directly diagonal to one another.
- Optional: /obj/machinery/colony_floodlight_switch somewhere on the map to allow floodlights on the map (if there are any) to be turnt on and off with power.
Making an Area File
This assumes you know what an area is. To make one open up VSC and go to the File Explorer, Code > Game > Area, then create test.dm (replace test with your map name.)
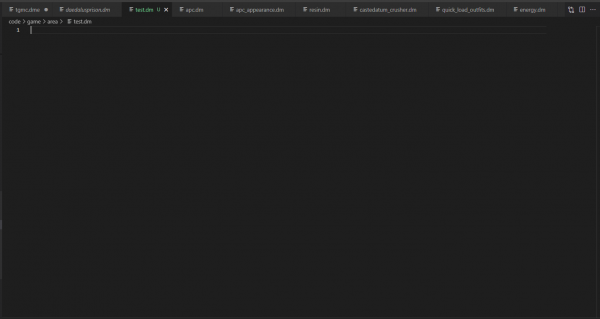
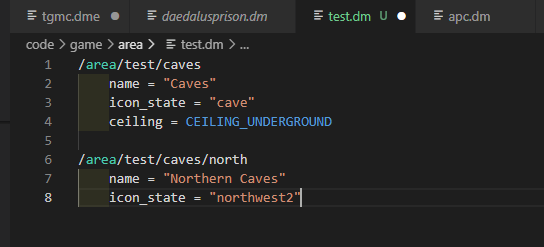
Now you have an empty area file! It should look like this.
An important thing to know about DM (the code language we use) is inheritance. So if I have area/test/caves, and it's ceiling is caves, area/test/caves/north will also have a ceiling of caves unless we define otherwise there. This makes for much nicer area files instead of having a bunch of var setting in each area type. Vars that you almost always set for each area type is name and icon_state. To find the icon's you can use for the areas (only mappers will see them) you can look in TGMC/icons/turf/areas.dmi in your file explorer. Simply set icon_state = "test" to see it pop up on the map. If that was too much, you can just see it here:
Check the other area files, make all the areas you need, re-open SDMM and then paint the map with your areas.
